Gmail: eenvoudige manier om meerdere vakken in uw account te maken
Als u problemen ondervindt bij het maken van de meerdere vakken in uw Gmail-account, hoeft u zich geen zorgen meer te maken. Omdat je nu absoluut op de juiste plek bent, zoals hier, zullen we je de juiste stappen begeleiden voor het maken van de meerdere vakken in je Gmail-account. Het is de bedoeling dat u de blog zorgvuldig doorneemt en geen van de stappen overslaat, anders kunt u problemen ondervinden bij het maken van de meerdere vakken.
De stappen voor het maken van de meerdere vakken in uw Gmail-account worden hieronder beschreven. U wordt aangeraden ze goed door te nemen en in geval van problemen wordt u aangeraden contact op te nemen met experts van Gmail Nummer +31-708080317 voor hulp.
- U moet eerst naar uw respectieve computer gaan en het Gmail-account openen en vervolgens naar rechts bovenaan in Gmail gaan.
- Nadat je dat hebt gedaan, moet je naar de instellingsoptie gaan en dan naar het type inbox gaan.
- Daar wordt u voorgesteld om op de meerdere inboxen te klikken en vervolgens naar de optie Aanpassen te gaan.
- Nadat u dat heeft gedaan, moet u naar de zoekcriteria gaan en moet u de sectienaam opgeven.
- U moet de naam correct invoeren en dan moet u het maximale paginaformaat selecteren.
- Daarna moet u het aantal e-mails invoeren en vervolgens naar beneden verplaatsen en op de optie voor het opslaan van wijzigingen klikken.
We hopen dat u na het volgen van de bovenstaande stappen eenvoudig de meerdere vakken in uw Gmail-account kunt maken. Als je een assistent nodig hebt met betrekking tot je Gmail-account, of als je iets stoort met betrekking tot Gmail, dan wordt je zonder enige tijd te verspillen aan Gmail Klantenservice Nerderland voorgesteld voor hulp. Ook zijn de experts te getalenteerd; zij zullen uw problemen in een mum van tijd oplossen, dus stop met het verspillen van uw tijd aan het nadenken over Gmail-problemen en neem onmiddellijk contact met ons op voor de oplossing.
Hoe e-mails in Gmail-account te drowsen of te snoozen?
Gmail is ‘s werelds grootste e-mailservice provider met toegang tot functies en hulpmiddelen die de andere webmail provider de betaalde gebruikers aanbiedt. Deze service is de standaard geworden voor de beste gratis e-mail met geweldige en uitstekende functies. Ongeacht de beste in het sociale scenario, wordt Gmail echter ook geconfronteerd met bepaalde fouten en technische fouten die het werk van zijn gebruikers belemmeren. Een van de meest voorkomende problemen die de Gmail-helpdesk zo nu en dan tegenkomt, is dat een persoon e-mails in een Gmail-account snel en gemakkelijk kan lezen of snoozen. Maakt u zich ook zorgen over het specifieke probleem of andere problemen met uw Gmail-account? Dan bent u op het juiste informatieve blog beland.
Stappen om e-mails op Gmail-account snel en gemakkelijk te doorbladeren of te snoozen, worden hieronder vermeld:
- Open of meld de Gmail-app op uw apparaat aan via elke browser.
- Ga naar het bericht of e-mailadres dat u wilt sluimeren of drowse.
- Tik op het menu met drie stippen in de rechterbovenhoek van het scherm.
- Tik op de sluimeroptie zodra deze verschijnt.
- Selecteer de datum en tijd tot wanneer u het bericht gesnoozed wilt houden.

Dit zijn de punten om e-mails in Gmail-account gemakkelijk te bekijken of te snoozen. Als je meer informatie nodig hebt over de vraag met betrekking tot het Gmail-account, of het nu gaat om het herstellen van een Gmail-account of andere zorgen over je account, neem dan gerust contact op met ons professionele en deskundige team bij Gmail telefoon Nederland met de gewenste communicatie modus. Het is onze taak om de urgentie van de situatie en de waarde van uw tijd te begrijpen. Daarom behandelen wij uw probleem als onze hoogste prioriteit. U kunt ons bereiken via live-chats, e-mails en telefoontjes volgens uw comfortzone. We bieden ook 365 dagen service voor de deur zonder een excuus dat ook zonder verborgen / extra kosten. Dus denk er maar niet over na en maak contact met ons voordat het probleem groot wordt. We zijn verplicht als we u kunnen helpen met effectieve resultaten.
Originele bron: http://gmailondersteuningtelefoonnummer.mystrikingly.com/blog/hoe-e-mails-in-gmail-account-te-drowsen-of-te-snoozen
How to Create a Recovery Disk in Windows 8 and 10?
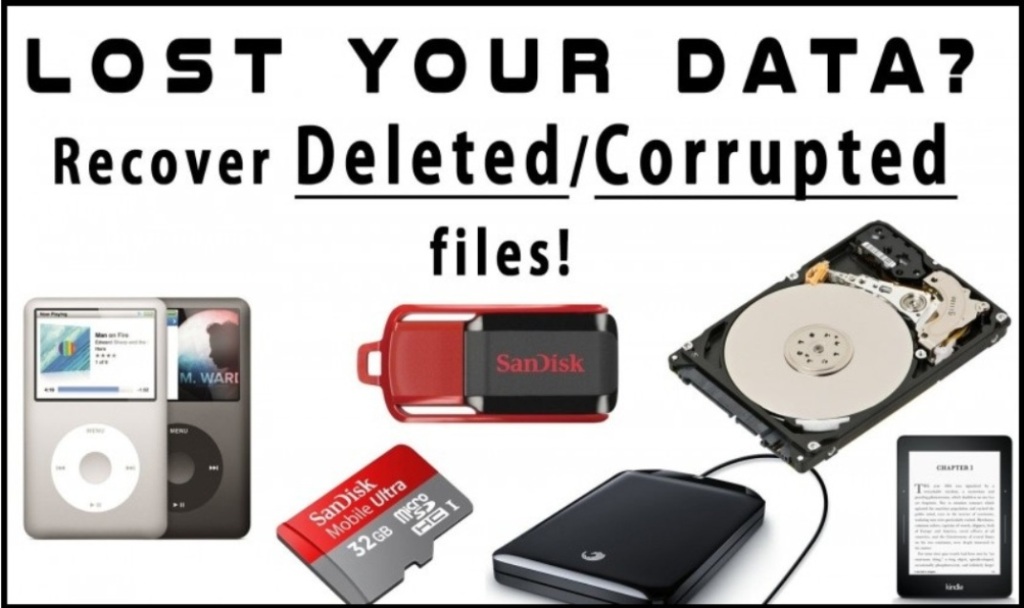
Lost data is one of the most major issues that bother the modern world every now and then. If the important data gets lost then this situation creates a kind of frustrating situation for the users. The data recovery center situated in Sydney is the one-stop solution for all your data-related issues. One of the common queries that make users worry is that how can a person create recovery disk in Windows 8 & 10. Are you also worried about the same issue or some other concern related to your lost data from laptop, USB, hard drive, computer, smartphone and so on? You can contact at Gold Coast Data Recovery to resolve your query. Then keep reading this informative blog for seeking further knowledge in order to get rid of your problem easily.
Steps to create a recovery disk in Windows 8 and 10 in an easy way are mentioned below:
- You need to press the Windows key + S key to launch the search and type recovery drive in the search bar.
- Choose the option to create a recovery drive from the search results irrespective of the type of media you have selected.
- Tick the option of backup system files to recover the drive and then tap next if you want to create a recovery flash drive.
- Opt to create to build the disk and add the finish option if you are done with all the changes to create a recovery disk.

These are the points to create a recovery disk in Windows 8 and 10 in an easy way. In case the above-mentioned instructions related to data recovery don’t provide you with desired results then feel free to contact our expert and professional experts at Melbourne Data Recovery via live-chats, phone calls and emails as per your preference and convenience. Understanding the urgency of the situation and value of your time is our job this is why we treat your concern as our topmost priority. So, don’t give it a second thought and connect with us immediately and instantly without any hesitation. We will feel obliged to help you for sure.
--------------------------------------------
Original Source:
How to Recover or Reboot the Files and Pictures from USB Drive?
Online Data Recovery Service Centre is situated in Australia, where the online data recovery team provides expert and preventative measures to recover information, documents, and file. This service center understands the importance of your lost data and gives easy getaways at the customer’s service immediately. Different types of data like data in the raid, handycam, emails, mobile phone, USB, Hard drive and iPhone are handled delicately by the security center. The data recovery center also has an enormous client base across the globe. One of the most recurring concerns that people put across is how can a person recover or reboot the files and pictures from a USB drive. Are you also worried about the particular question? Then this blog is worth giving a read.
Steps to recover or reboot the files from the USB drive are written below:-
- Connect the USB drive to your preferred device first.
- Install and download the disk drill and choose the drive from the list of current drives.
- Tap the recover button and give a preview to the file by clicking to the eye icon next to the file name.
- Lastly, select and save the recovered or rebooted files.
Steps to recover or reboot the pictures from the USB drive are written below:-
- Connect the USB flash drive on which your pictures are stored.
- Launch EaseUS USB data recovery software that is a data recovery wizard in your device
- Choose the USB drives under the section of external devices
- Scan your lost pictures and recover them to save.
These are the steps to recover or reboot the files and pictures from a laptop. If you require more elaborated and practical information about the same then feel free to connect with Melbourne Data Recovery anytime. We assure you better and 100% effective and efficient way-outs to your queries. Our expert and professional team will help you with all possible ways and means. Understanding the urgency and delicacy of your concern is the topmost priority for our specialists.
Original Source: http://datarecoveryvic.mystrikingly.com/blog/how-to-recover-or-reboot-the-files-and-pictures-from-usb-drive
How to Restore all the Lost Data on your Device?
If you are facing any difficulties while restoring all the lost data, then no need to be upset anymore. Because in this blog, we are going to guide you on how to do the same in Easy ways and for this, you are only required to read the blog carefully and follow the steps one by one for the appropriate solution.
Basically, here we will discuss two methods for restoring all the lost data. The methods are mentioned below:
METHOD 1: The very easy way to recover the lost data by taking the help of previous version.
- This method is only applicable for 10/8 window, so if you have the same version, then only move forward, otherwise visit our website for help.
- You need to first visit the option called ‘file history’. There you are required to choose the previous version.
- Now, just after going there, you are required to select a file that you want to restore, after selecting, give a click on ‘restore’ button.
- Thus, this way you will get all the data back on your device very easily.

METHOD 2: With the help of windows backup, you can restore all your lost data back.
- First of all, go to the control panel option.
- There you are required to select the option for ‘system and maintenance’.
- Now, you need to move to the backup and restore option.
- After that, move to ‘restore my files’ > browse for files > navigate a location.
- Thus, after doing this all, your data will get restore in some time.
For more details, you need to visit our website and look for many related blogs. Otherwise, you can directly contact Melbourne Data Recovery for help. Our specialists are very talented and experts, they would fix your issues in no time, therefore stop roaming here and there, and reach us as soon as possible.
-----------------------------------------------
Original Source: https://cheapdatarecoverymelbourne.wordpress.com/2019/12/30/how-to-restore-all-the-lost-data-on-your-device/
Recover a Hard disk that is not detecting
If users having a problem to detect a hard disk on their Windows or Mac device, they don’t have to worry about instructions on this issue because this problem can be resolved easily. All you need to do is contact our data recovery team and get step by step instructions to recover the missing data. However, there are some tools that make your life easier and better. Just download that tool and recover your lost data. But there is enormous software that is genuine and fake; you have to figure out before you use it. Or you that simply step forward to contact the professionals at Melbourne Data Recovery to recover your hard disk data.
Though, there are several ways to recover the Hard Disk, follow the below steps and retrieve your data-
On your Windows device, follow the steps precisely-
- Turn on your device and press Windows + R keys to open the run dialog box.
- Enter “disjmgmt.msc” into the dialog box and hit the enter key.
- Now, the disk management window will open, check whether your hard disk is there.
- If your disk is marked Yellow that means there is a problem thus it is not detecting. Click on the disk and select properties. Read the error and find the solution.

You can try these troubleshooter to recover your data if the above solution isn’t helped you.
- Try to change the cable which you connect with your disk and device.
- Use another port to plug the Hard disk.
- Disable the selective suspend settings; navigate to the Control panel, click on Additional Power Settings, choose Change Plan settings, then click on Change Advanced Power Settings and hit to the USB Selective Suspend Settings.
- And then select Disable.
- Another troubleshooter is to uninstall and reinstall the system software.
- On your computer, go to the Update Driver Software.
- Select Search Automatically for Updated Driver Software and follow the instruction to update the software.
Hopefully, you have retrieved your Hard disk data. If you haven’t recovered your documents yet, feel free to reach the experts to get back your lost files. The Data Revival Gold Coast specialized team will completely help you recover the lost file.
----------------------------------------------------------
Original Source: https://datarecoverygoldcoast.weebly.com/blog/recover-a-hard-disk-that-is-not-detecting
How to Recover Lost Data on Android without Reboot?
There are lots of ways to recover lost data or deleted data. Here on this page we will guide you to recover your file without reboot your system. If you don’t find yourself comfortable to recover the data, we recommend you to take an expert’s advice. You can reach the Data Recovery Service Gold Coast team to get your issue completely resolved by our great executives. Besides, reaching the expert’s solution you can continue reading this page till the end and get easy solution without any charge. We don’t ask for hidden charges or additional costs. People can rely on our service and ask for more technical support.
If your Android device is corrupted or the data get formatted unintentionally don’t worry, we will resolve your issue and ensure you great assistance. We will recover your data without rebooting your device. You can use a tool to recover your data in a user-friendly way.
Follow the below steps and recover your Android device without rebooting-
First of all, make sure you have downloaded and install the dr.fone on your computer system. This application will help you to retrieve your account effortlessly.
Solution 1: Connect your device
- Open the recovery application (dr.fone) on your system and select the Recover tab.
- Now, connect your phone to your system. Also, ensure you have enabled the USB Debugging feature on it.
- On your phone tap on the settings, tap on about phone and hit the Build Number seven consecutive times.
- This process will enable developer options on your phone.
- Go to the settings, click on developer options and enable the USB debugging.

Solution 2: Select data files to scan
- The application will automatically recognize your phone and provide a list of various data files that it can scan for the recovery process.
- Choose a file you want to recover. For instance, if you want to recover a photo, enable gallery option. After making your selection, tap on the Next button.
Solution 3: Select a mode to scan
- On the next screen, you have to select a data recovery mode.
- Now, sit relax, the process may take time to recover your data.
Solution 4: recover files like photos, videos, messages, etc
Once you have recovered the data, the applications will automatically un-root your device. This will recover your data in an organized manner. You can simply preview the data files you wish to retrieve. Choose a file you want to save and then hit the Recover button.
These are the solutions you can follow to recover the lost data on your Android device. If still, you have any issues while recovering your data contact our experts on Cheap Data Recovery Melbourne and recovered your data in a segregated manner. Our professionals will ensure you the best and ideal way to get back your lost file.
---------------------------------------------------